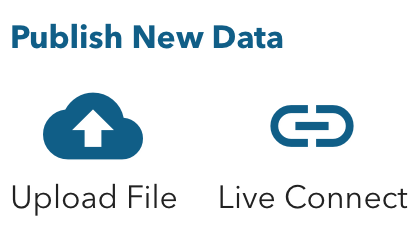
SmarterWX provides three methods for publishers and project owners to add data to SmarterWX:
- File upload – This help article describes the file upload method.
- Live Connect – For Live Connect data synchronisation using a feature service, please read this article.
- Quick add or edit – To add projects or exclusion zones quickly on the go, please read this article.
We recommend viewing this video before uploading data using file upload. It will give you a good overview of the loading process.
Prior to uploading any data to SmarterWX a dataset needs to be created by the Publisher.
Roles: Administrators can create a dataset and are able to upload data as they also have Publishers permissions. Project owners can create data via the quick add or edit flow, but can’t upload data. Users can not upload data nor create data.
Prepare your data, ensuring it is accurate, complete, current, contains the correct spatial reference and has been approved to be uploaded into the SmarterWX system.
- Click the Data button located on the navigation bar.
- Click Upload File button under the Publish New Data section.
- Enter the name of the dataset and press Enter
Tip: Make dataset names unique and descriptive. You are able to include spaces, numbers and special characters.
What are the data types?
There are two classes of data that can be uploaded to a dataset – Construction Projects and Exclusion Zones.
Construction Projects – planned future works describing where and when projects will be undertaken. Projects often contain multiple tasks. For example an intersection safety upgrade may include the installation of multiple Smart poles as well as TGSIs.
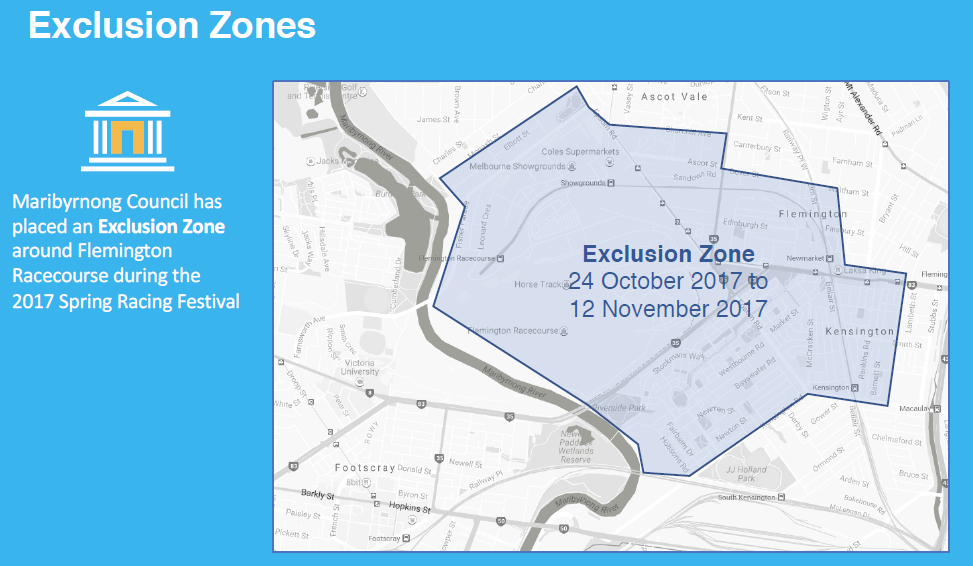
Exclusion Zones – a collection of embargoed areas where works cannot be performed at defined times. An Exclusion Zone represents a place and time where an embargo has been placed on street works. This could represent a parade, fun run or street market. Organisations should plan their works around these exclusions.
Tip: Each dataset can be carried forward from a previous dataset where no changes have occurred. If you have a dataset which is currently live you can copy the data and rules forward from the live data.
Uploading Construction Projects data
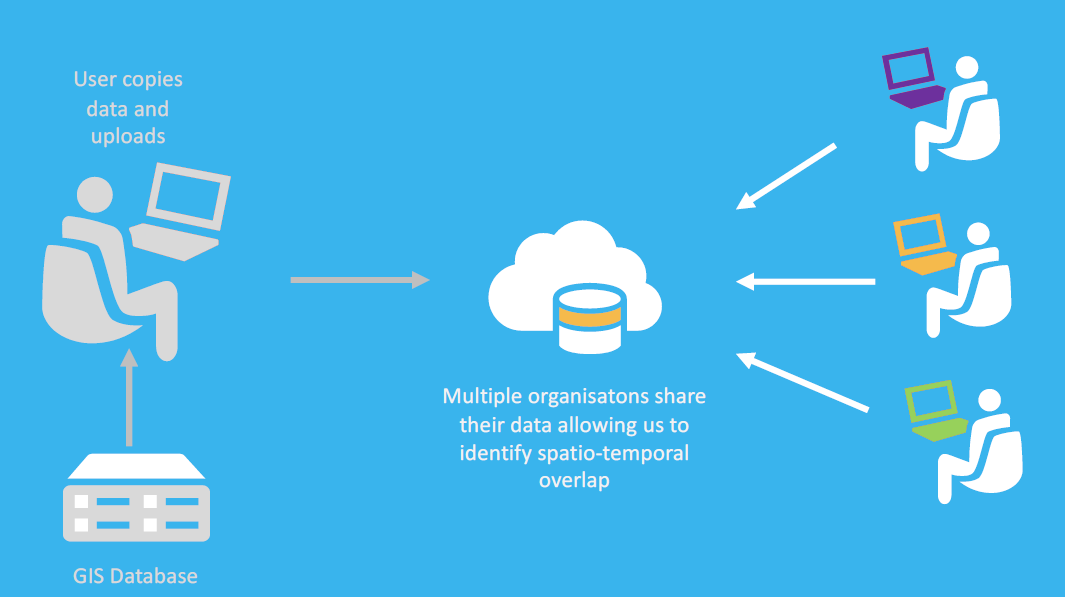
Uploading data is the process of copying your local data to the SmarterWX repository.
Each member uploads their planned construction projects scheduled for the coming year(s). Each construction project has a spatial boundary and a planning start and end date. This information is used to look for spatio-temporal (space-time) overlaps between different projects.
Note: this compressed folder must contain a single spatial layer representing your organisation’s construction projects. This layer must adopt the following base schema.
Table Structure for Construction Projects data
Geometry = 2D Polygon, Polyline or Point (note 3D data will fail)
| Field name | Data type | Description | Example |
| Notes | TEXT | Free text (max 1000 chars) | Pipe renewal and relining |
| SourceID | TEXT | Persistent identifier for matching uploads (max 50 chars) | 10083997 |
| StartDate | DATE | 28 July 2017 | |
| EndDate | DATE | 15 May 2018 | |
| Status | TEXT | One of [PROPOSED, CONFIRMED, CONSTRUCTION, CLOSED, ABANDONED] | CONFIRMED |
| WorksClass | TEXT | One of [WATER, GAS, ROAD RESURFACING, STORMWATER, SEWERAGE, ROAD CONSTRUCTION, STREET FURNITURE, GAS, POWER ABOVE GROUND, POWER BELOW GROUND, COMMUNICATIONS, FOOTPATH, LANDSCAPING/VEGETATION, BIKEWAY, STRUCTURES, FENCING, KERB/CHANNEL, MEDIANS, TRAFFIC MANAGEMENT, TRANSPORT MANAGEMENT, WATERWAY, OTHER] | GAS |
| TEXT | Email address of the Project Contact (max 100 chars) | support@esriaustralia.com.au | |
| Private | BOOLEAN or TEXT |
If true, this project will only be visible within your organisation and opportunities and conflicts will only be created for this project within your organisation.Value should be either ‘true’ or ‘false’. | true |
| BufferDist | INTEGER | The buffer distance in meters that is applied when loading either Line or Point features. This is not required when loading polygons. Default value: 20 meters | 20 |
Note: Additional custom attributes are also allowed. These are user-defined for your organisation and will be visible only within your organisation’s view.
- Select the File Type contained in the zip file from the following list of options:
- Esri File Geodatabase (.gdb)
- Esri Shapefile (.shp)
- MapInfo TAB File (.tab)
- KMZ (Google) (.kmz)
- Comma-Separated Values (.csv)
Sample data files can be downloaded from here.
- Click the Upload button.
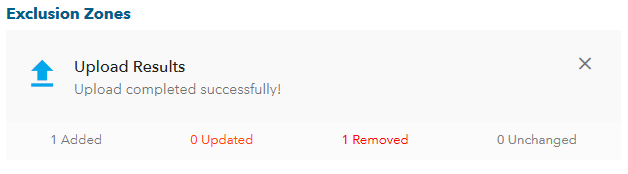
Once the upload has completed you will be presented with the Upload Results which show counts for new, deleted, changed and unchanged records.

You can view your data on the map by clicking the Show on Map button.
If your data contains errors, the entire data file will not be uploaded and you will need to resolve the errors before it can be accepted into your dataset. You will also be sent an email notification advising that your data failed to upload
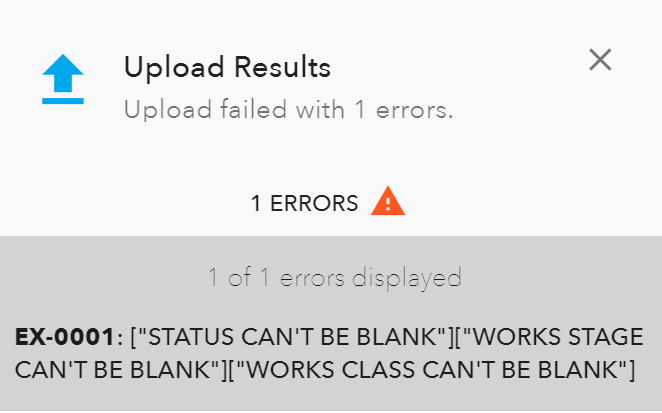
Tip: Review the results paying attention to the number of records added and any errors reported.
Uploading Exclusion Zones data
If your organisation has embargoed areas where works cannot be performed at certain times, you can upload these exclusion zones by following the steps below.
Note this compressed folder must contain a single spatial layer representing your organisation’s exclusion zones. This layer must adopt the following base schema.
Table Structure for Exclusion Zones data
Geometry = 2D Polygon, Polyline or Point (note 3D data will fail)
| Field name | Data type | Description | Example |
| Notes | TEXT | Free text (max 1000 chars) | Anzac Day parade |
| SourceID | TEXT | Persistent identifier for matching uploads (max 50 chars) | EX-0007 |
| StartDate | DATE | 24 April 2017 | |
| EndDate | DATE | 26 April 2017 | |
| TEXT | Email address of the Project Contact (max 100 chars) | support@esriaustralia.com.au | |
| Private | BOOLEAN | If true, this project will only be visible within your organisation and opportunities and conflicts will only be created for this project within your organisation.
Value should be either ‘true’ or ‘false’. NB: This must be in lowercase. |
true |
| BufferDist | INTEGER | The buffer distance in meters that is applied when loading either Line or Point features. This is not required when loading polygons. Default value: 20 meters | 20 |
Note: Additional custom attributes are allowed. These are user-defined for an organisation and will be visible only within that organisation’s view.
- Select the File Type contained in the zip file from the following list of options:
- Esri File Geodatabase (.gdb)
- Esri Shapefile (.shp)
- MapInfo TAB File (.tab)
- KMZ (Google) (.kmz)
- Comma-Separated Values (.csv)
Sample data files can be downloaded from here.
- Click the Upload button.
Once the upload has completed you will be presented with the Upload Results which show counts for new, deleted, changed and unchanged records.
If your data contains errors, the entire data file will not be uploaded and you will need to resolve the errors before it can be accepted. You will also be sent an email notification advising that your data failed to upload.
Tip: Review the results paying attention to the number of records added and any errors reported.
Matching Rules
Once the Publisher has verified that the data is correct they will then set the opportunity and conflict rules for the organisation. These can be copied from any existing live dataset.
Opportunity Rules
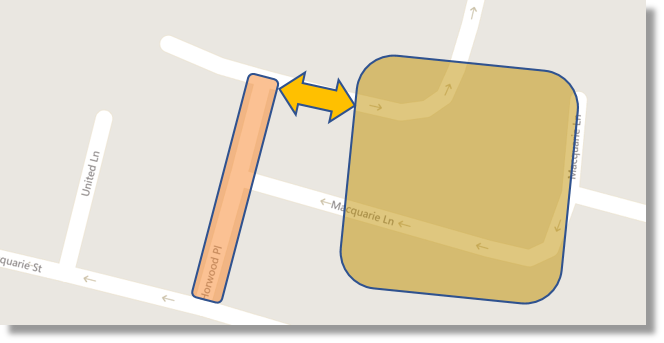
The Opportunity Rules describe the distance between projects and exclusion zones for which they will be considered to overlap, and the maximum interval between project and exclusion zone dates required for identifying an opportunity.
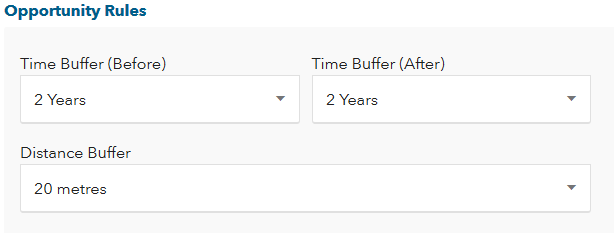
Enter Opportunity Rules
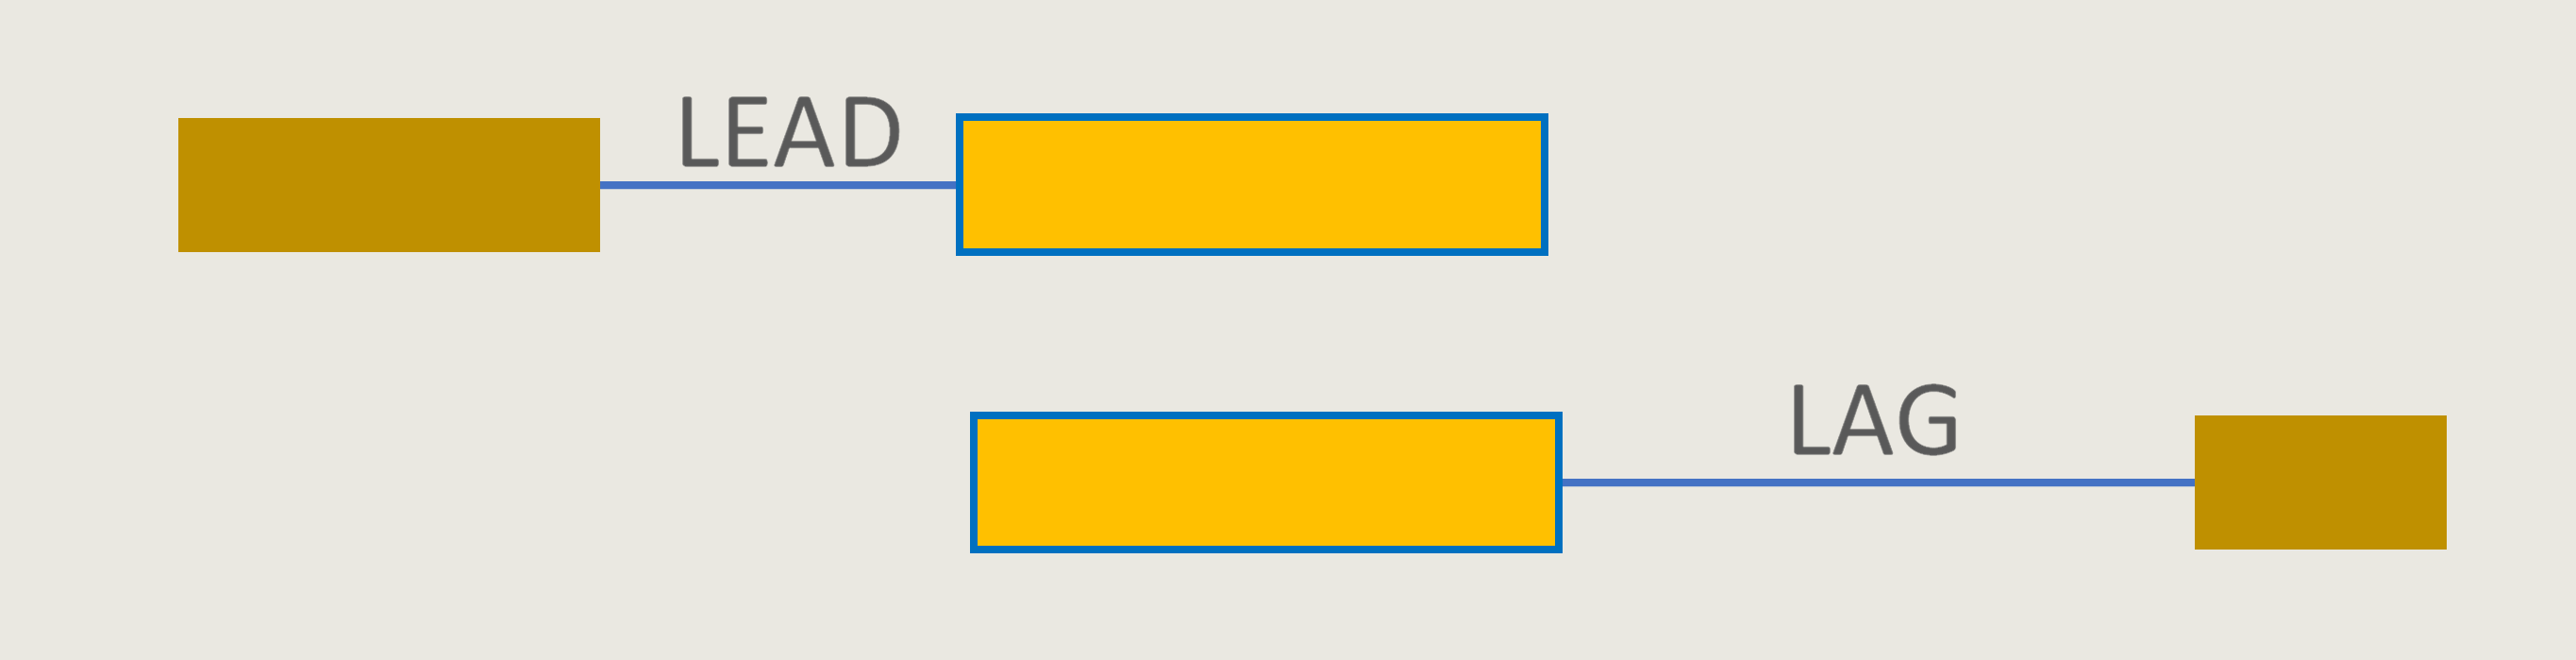
- Select the appropriate Time Buffer (Before) value for the drop-down list. This sets the lead time prior to the start date of the project
- Select the appropriate Time Buffer (After) value for the drop-down list. This sets the lag time after the end date of the project
Lead-time and lag-time rules are set, specifying the maximum time between two projects for them to be matched and potential collaboration opportunity to be identified.
Next, we will specify the Distance Buffer
- Select the appropriate Distance Buffer value for the drop-down list.
This sets the maximum distance between projects and is used to help determine whether an opportunity for collaboration exists between two projects.

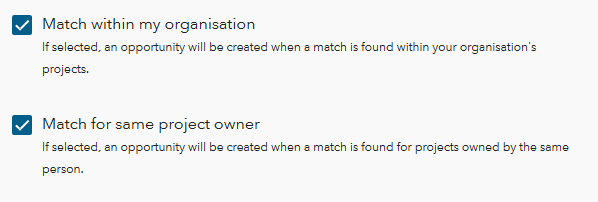
Finally, opportunities can be filtered to match other opportunities within your organisation, and when multiple projects are owned by the same person.
If the first option, Match within my organisation, is selected an opportunity will be created when a match is found within your organisation’s projects. This can assist in coordinating efforts and reducing costs in large organisations that manage multiple projects.
When Match within my organisation is selected, you will also have the option to select Match for same project owner. If both are selected, an opportunity will be created only when a match is found for projects owned by the same person within your organisation.
4. Check the box next to the desired option to make a selection
Conflict Rules
Conflict Rules describe the distance between projects and exclusion zones for which they will be considered to overlap, and the maximum interval between project and exclusion zone dates required for identifying a conflict.
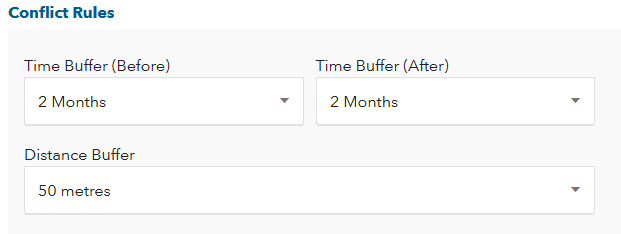
Enter Conflict Rules
- Select the appropriate Time Buffer (Before) value for the drop-down list. This sets the lead time prior to the start date of the project or exclusion
- Select the appropriate Time Buffer (After) value for the drop-down list. This sets the lag time after the end date of the project or exclusion
Lead-time and lag-time rules are set, specifying the maximum time between project and exclusion zone for a conflict.
Next, we will specify the Distance Buffer
- Select the appropriate Distance Buffer value for the drop-down list.
This sets the maximum distance between project and exclusion and is used to help determine whether a conflict exists between the exclusion zone and project.
Finally, conflicts can be filtered to match those within your organisation, and when a projects and exclusion zone are owned by the same person.
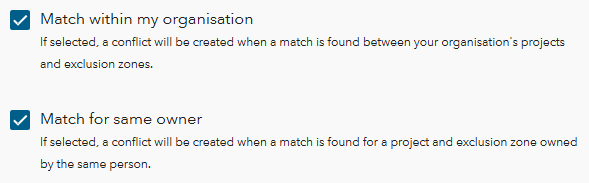
If the first option Match within my organisation is selected, a conflict will be created when a match is found between your organisation’s projects and exclusion zones. This can assist in project management and ensure business rules are enforced.
When Match within my organisation is selected you will also have the option to select Match for same owner. If both are selected, a conflict will be created when a match is found for a project and exclusion zone owned by the same person.
4. Check the box next to the desired option to make a selection.
The Analyse button performs the Analyse Impact step of the workflow. It gives the user an indication of how many opportunities and conflicts will be created because of the selected rules. This allows the user to fix conflicts before they are notified and to adjust the rules to remove too many false opportunities being created.
Note: Adjustment of the matching rule parameters is performed manually and will likely be an iterative process, adjusting and analysing until the Publisher is satisfied with the results.
Publish the data
Once the data has been uploaded, and the rules have been set and analysed the Publisher publishes the data which makes the data live and triggers notifications for all affected project owners.
- Click the Publish button
The data will be public after publishing.
There is no limit to the number of datasets that can be uploaded, however only one dataset can be live at any time. For example, if you have published a dataset and then make a second dataset live, your original dataset will become Private.
Note: You can also delete a Private dataset. If the data is live it must be unpublished before it can be deleted.