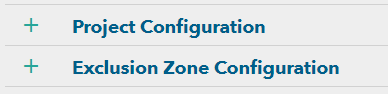
After configuring your ArcGIS Server or ArcGIS Online connection, the Project Configuration and Exclusion Zone Configuration sections of the Live Connect form will open and be ready to configure:
Parts of the form will be disabled and unavailable for configuration, until a previous step is completed.
Note: The configuration of Projects and Exclusion Zones is exactly the same, except that Projects have more fields required to configure. You can publish a Live Connect with only a Project or Exclusion Zone configured, or both. The steps below will describe the process used for both.
- Begin by selecting an available Feature Service from the Feature Service Name drop down:

- Once a Feature Service is selected, you will be able to select a Layer Name from the next drop down. The layer name corresponds to the specific layer within your Feature Service which contains your Projects or Exclusion Zone data:

- Once a Layer Name is selected, the Field Mapping form will be active and ready for configuration. The Field Mapping form is used to map your layers fields to the required fields within SmarterWX. The required fields (Notes, Source ID, Start Date etc.), as well as any custom fields (‘extra’ in the example below), are listed on the left-hand side and each has its own drop down. The drop down will be populated with your layer’s fields, but will only contain fields with datatypes that match the SmarterWX field (e.g. the Start Date drop down, will only contain fields in your layer which have a date data type). SmarterWX will attempt to automatically populate the field mappings based on the field names within your selected Layer, however, these can always be changed manually.
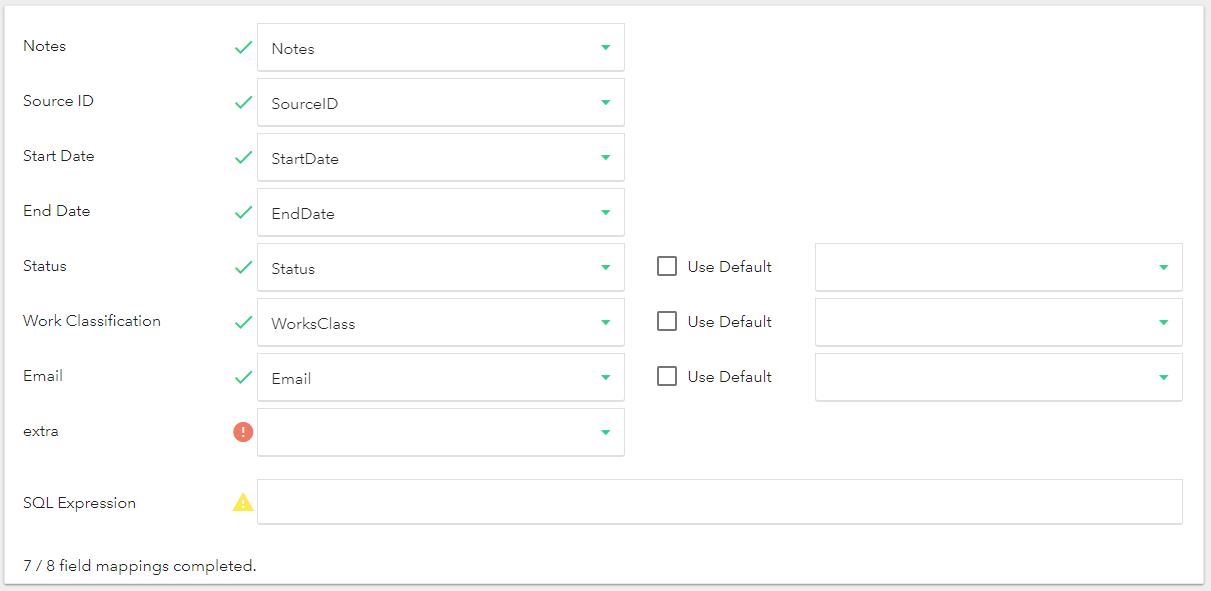
- As you proceed through the field mappings, each mapping will change its symbol based on any errors or warnings detected with the mapping (hover over a symbol for more information):
 – The success symbol means no issues have been detected with this mapping.
 – The warning symbol means a warning has been found (non-required field not mapped, field length different than SmarterWX), however, you may continue with this warning.
 – The error symbol means an error has been found (required field not mapped) and you cannot continue until it has been resolved.
- An optional Use Default setting is available on the Status, Work Classification and Email fields. Because these fields have a specific domain of values allowed, or for Email, must be set to a valid users email with SmarterWX, you can select a default value to be used for this field. The default value will only be used if your input data does not have a valid value for that field. The default value is processed for each individual Project or Exclusion Zone (i.e. it is not bulk applied to all input data) only when the field value is invalid.
- A SQL Expression can be defined, to filter the records within the layer to a smaller subset of records. All expressions must adhere to the ArcGIS Server Standardised Queries.
- Once all mappings are completed, click Validate Data. This will run through a process to vaildate your field mappings and provide feedback about errors or warnings found within the data.

- If your data contains errors or warnings, you will be shown a list of the first 50 errors and warnings. If you have errors in your data, you cannot continue the Live Connect configuration until these errors have been resolved and you have re-validated the data. If you have only warnings, you may choose to resolve them or continue with these warnings.
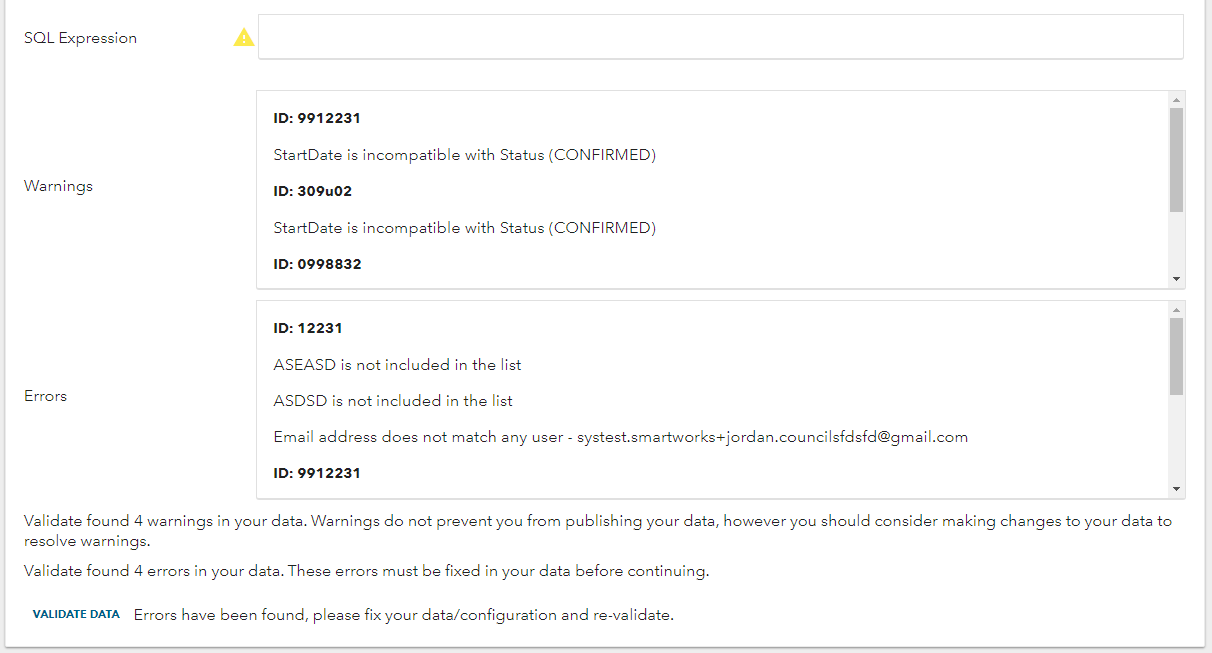
- Once all errors are resolved you will be shown the success message and can continue to Set Matching Rules.

Note: Remember, you can choose to configure only Projects or Exclusion Zones, or both.